Edit: Before reading, I want to make it clear that this is a very specific business case scenario in which you are migrating forest’s rather than introducing new 2012R2 Domain Controllers and demoting the 2008R2 DC’s. While this is a rare scenario I wanted to put some information out there encase anyone finds themselves in need of it. Of course before you even think about this sort of project you will want to do all of the associated ground work that comes with a forest migration.
So, you’ve been tasked with a very specific job over migrating users from one forest to another as part of a hypothetical business merger or forest rename.
Well… Let’s talk about how were going to do this. Now I’m not saying this is going to be simple or make a lot of sense at first, but I’ll try to get you there in one piece.
Let’s start with the tools we’re going to be using:
- PowerShell
- ADMT
- SQL Server Express (2008)
- Password Migration Tool
What I want to show more than anything with this post is that (if you didn’t hear it from me enough) PowerShell is awesome for automation. Even with tasks such as an AD Migration you will save countless hours by using PowerShell to automate the migration process.
I’m going to assume for this post that you are going from 2008R2 to 2012R2. With 2016 right around the corner this can be a strange move. However, I understand the need to do this. So let’s get started.
Step 1: Understanding
Whoa there, before we get to crazy automating this process we need to fully understand what the hell we’re doing and why. Things you should understand before even looking into this sort of task are:
- Why am I doing this?
- What is the business need?
- Which services that rely on AD authentication within your environment?
- How are we going to stage this migration?
If you cannot answer all of these question’s you will want to call a timeout.
You will also want to make sure you’ve sorted out a standard of naming users/groups and any sort of theory type work that is going to take place in the new forest before commencing any of this sort of work to avoid hold up’s.
Like anything you want to do well, you need to spend time investigating the current state of your domain. If you simply just lift and shift your domain over to a new fresh environment would it really be called a success?
You may have hundreds of old groups, disabled users, obsolete GPO’s. It’s for this reason I would suggest using PowerShell to really dig into your environment to pull out any weeds before you move anything over to the new domain.
Let’s take a look at how we can use PowerShell to dig deeper into Users, Computers, Groups and GPO’s. I’ve made a quick function as an example which can be found here
Once you’ve had a look at your environment and done some cleaning up I would suggest creating multiple CSV files (we’ll use these later) with stages of whom will be migrated. Maybe you want to migrate a certain business unit before another, maybe in smaller chucks. This preparation step is super important so don’t sleep on this.
Step 2: Begin
This step assumes you’ve created a 2012R2 Server which is not part of the current 2008R2 domain.
Firstly, our 2012R2 server will need to be a Domain Controller itself. In order to do that we can simply install the AD-Domain-Services feature and create a new forest.
Install-ADDSForest -DomainName NewDomain.corp.com `
-DatabasePath 'C:\NTDS' `
-DomainNetbiosName 'NEWDOMAIN' `
-LogPath 'C:\NTDS' `
-SysvolPath 'C:\Sysvol' `
-Verbose `
-Force
So now we’ve got our fresh new domain up and running. Let’s create a user that we’re going to use through this migration to do all of our migration tasks. We’ll create this user in both the old domain and the new domain.
Transitional Trust


Conditional Forwarders


SQL
Let’s now move onto setting up the environment we’re going to need for this all to work. The ADMT tool requires that a SQL server be installed in order for it to store information on the migration process among other things. For the process of this post I’m going to be using SQL Express. In my experience the ADMT tool will freak at you if you try to use any other version of than 2008 SP1 of SQL Express.
So SQL requires .Net 3.5 to be installed so we better do that:
Get-WindowsFeature Net-Framework-Features | Install-WindowsFeature -verbose
Once that’s installed we can install SQL. like I mentioned earlier, I’m installing SQL express 2008 on my 2012R2 (New domain) Domain Controller. There are pro’s and con’s of this however you can simply remove SQL after the migration process.
Let’s fire up our installer:


Active Directory Migration Tool (en-US admtsetup32.exe)
Let’s install the ADMT now and come back to using a bit later on. It has a very simple installation wizard.


Password Migration tool (en-US-pwdmig.msi)
This tool allows us to export the password’s from AD user objects.
This is important since we don’t want our users to even notice that they have been migrated. The nature of this tool requires it to be installed on the ‘olddomain‘ domain controller. Before we can jump into installing it on the source domain we need to extract a .PES file from the ‘newdomain‘ that will allow us to unencrypt those passwords as they come in from the migration.
On our target 2012 R2 domain controller let’s fire up a cmd or powershell (Administrator) console and change directories to where you’ve installed the ADMT.exe file. By default this is C:Windows\ADMT.
From here we need to generate that .PES key. so let’s run:
admt key /option:create /sourcedomain:olddomain.corp.com /keyfile:"c:\PES.pes" /keypassword:*
You’ll notice here in the source domain I’ve put in ‘olddomain.corp.com’ . You will want to adjust this to your source domain of course. After you’ve executed this command and put in a password associated with the .PES file you should have a nice export sitting where you specified above. Let’s copy that .PES file over to our source domain controller now so that we can setup the password migration tool.
So now, once you’ve copied that file over to the source DC you would fire up the password migration tool and hit next, next, finish. But hold up. I noticed this weird error when trying to import the .PES file.

I’m pretty sure that this error has no idea what it’s talking about. You may of come across this before and banged your head against a way for many hours.
Here is how to get around this silly error.
- Open up PowerShell (or cmd) as Administrator
- Navigate to your en-US pwdmig.msi
- Execute the .msi

Once you’ve hit Install you will be prompted to choose an account in which the Service will run under. For the sake of this blog post I’m going to go with the default and just say Local System. However when you’re doing this in production you may want to create a new account for running this service.

After the installation your source DC will need a restart.
Once restarted you should see the Password Export Server Service (PesSvc) in a stopped state.
Let’s start that up. You’ll want to keep an eye on this Service since its start-up type is manual. Remember you will need it running to export any passwords during migration.
Step 3: Migration
Now, if you’ve made it this far I expect you to be feeling pretty confident about this migration process. You’ve done some more reading on the side, You’ve setup this whole environment in a Dev area away from anything even remotely production.
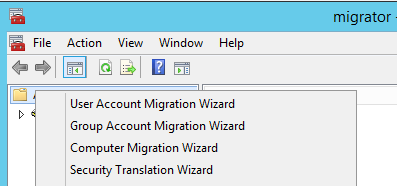
Let’s get started by migrating a test user via the GUI so we know what to expect when automating a process like this in PowerShell.
GUI Migration


Get-Aduser -Identity testmigration -Properties Sidhistory

So now we’re happy with how our user migration has gone with our test user. We can logon to the new domain and still access our resources from the old domain thanks to our SID history migration.
Migration Automation
The next logical step is here is how can I automate this process? How can we make this easier with the tools we have.
Lucky for us we have PowerShell for that. Originally I stumbled across this function from PsCookieMonster (Thanks Warren!) on AD migration by creating a wrapper for the ADMT.exe tool.
This file contains bidirectional Unicode text that may be interpreted or compiled differently than what appears below. To review, open the file in an editor that reveals hidden Unicode characters.
Learn more about bidirectional Unicode characters
| <# | |
| This is a PowerShell function wrapping the ADMT executable to abstract out migrating Active Directory users. | |
| Read all the ADMT docs, and all the code and comments below before considering using this : ) | |
| The COM object was covered nicely by Jan Egil Ring: | |
| http://blog.powershell.no/2010/08/04/automate-active-directory-migration-tool-using-windows-powershell/ | |
| Unfortunately, the COM object does not support Include files, a critical requirement for us. | |
| Use this at your own risk. Seriously. | |
| Minimal testing and handling for scenarios outside of my use cases. Danger! | |
| No testing post sanitization. Danger! | |
| Some items are mandatory in this function, but not outside it… | |
| Some validateSets might not be complete | |
| Lots of shortcuts. This function is not exposed to anyone, it runs in a delegated, constrained endpoint… | |
| #> | |
| Function Migrate-ADMTUserCLI { | |
| <# | |
| .SYNOPSIS | |
| Migrate a user account using ADMT.exe | |
| .DESCRIPTION | |
| Migrate a user account using ADMT.exe | |
| Requirements: | |
| Must be run from 32 bit session | |
| Must be run from a system with ADMT installed | |
| Must be run with appropriate privileges | |
| If migrating SIDHistory, must be run from a domain controller | |
| IMPORTANT NOTES! | |
| Minimal testing and handling for scenarios outside of my use cases, use at your own risk! | |
| No testing post sanitization. Danger! | |
| Some items are mandatory in this function, but not outside it… | |
| Some validateSets might not be complete | |
| .PARAMETER samaccountname | |
| Source samaccountname | |
| .PARAMETER TargetSamaccountname | |
| Optional target samaccountname | |
| .PARAMETER SourceDomain | |
| Source domain that contains the user | |
| From /{SD | SOURCEDOMAIN}:"source domain name" | |
| .PARAMETER SourceDomainController | |
| Optional. Source domain controller | |
| If migrating passwords, pick the DC with the PES service | |
| From [/{SDC | SOURCEDOMAINCONTROLLER}:"source domain controller name"] | |
| .PARAMETER SourceOU | |
| Optional. Source OU that contains the user | |
| From [/{SO | SOURCEOU}:"source organizational unit name"] | |
| .PARAMETER TargetDomain | |
| Target domain to place the user | |
| From /{TD | TARGETDOMAIN}:"target domain name" | |
| .PARAMETER TargetDomainController | |
| Optional target domain controller. | |
| Pick the DC you're running ADMT on, if you're migrating SIDHistory. | |
| From: [/{TDC | TARGETDOMAINCONTROLLER}:"target domain controller name"] | |
| .PARAMETER TargetOU | |
| Optional target OU. Won't matter if you're merging. | |
| This takes a variation on canonical name. For example: | |
| contoso.org/users/Migration would be written users/Migration | |
| contoso.com/test/users would be written test/users | |
| From: [/{TO | TARGETOU}:"target organizational unit name"] | |
| .PARAMETER PasswordServer | |
| Optional Domain controller on the source domain where PES is installed and running | |
| From: [/{PS | PASSWORDSERVER}:"password export server name"] | |
| .PARAMETER PasswordOption | |
| How to handle passwords for the user account. Default is COMPLEX+NOTEXISTING. | |
| COMPLEX = Create a new complex password | |
| COPY = Copy existing password. REQUIRES PASSWORDSERVER / PES | |
| +NOTEXISTING = Do not update password if it exists already | |
| From: [/{PO | PASSWORDOPTION}:{<COMPLEX> | COPY}[+NOTEXISTING]] | |
| .PARAMETER DisableOption | |
| Optional handling for disable options. Default is TARGETSAMEASSOURCE | |
| From: [/{DOT | DISABLEOPTION}:{[DISABLESOURCE+]ENABLETARGET | DISABLETARGET | <TARGETSAMEASSOURCE>}] | |
| .PARAMETER MigrateGroups | |
| Optional, whether to also migrate groups. Default is $False | |
| From: [/{MGS | MIGRATEGROUPS}:{YES | <NO>}] no default value for intra-forest migration | |
| .PARAMETER MigrateSids | |
| Optional, whether to migrate SIDS. Default is True | |
| Requires that you run this from a domain controller | |
| Read the docs or see response from Cookie.Monster here for why: | |
| https://social.technet.microsoft.com/Forums/en-US/da52ca43-2b90-4faa-beb9-92720abb3194/admt-32-install-on-dc-or-member-server?forum=winserverMigration | |
| From: [/{MSS | MIGRATESIDS}:{YES | <NO>}] | |
| .PARAMETER IncludeFile | |
| Optional, whether to read from an include file. This overrides TargetSamAccountname | |
| From: [/{F | INCLUDEFILE}:"include file"] | |
| .PARAMETER ExcludeFile | |
| Optional, exclude file | |
| From: From [/{EF | EXCLUDEFILE}:"exclude file"] | |
| .PARAMETER ConflictOptions | |
| Optional, how to handle conflicts. Default is IGNORE | |
| MERGE lets us merge SIDHistory into existing user. | |
| From: [/{CO | CONFLICTOPTIONS}:{<IGNORE> | MERGE[+REMOVEUSERRIGHTS][+REMOVEMEMBERS][+MOVEMERGEDACCOUNTS]}] | |
| .PARAMETER UserPropertiesToExclude | |
| Optional. Properties to exclude. Pick * to avoid potentially pulling over the wrong property. | |
| From: [/{UX | USERPROPERTIESTOEXCLUDE}:{* | "property1,property2,…"}] | |
| .PARAMETER FixGroupMembership | |
| Will fix group memberships when re-migrating. Default is True | |
| From: [/{FGM | FIXGROUPMEMBERSHIP}:{<YES> | NO}] | |
| .PARAMETER OptionFile | |
| Option file to use. Not tested in my code, don't use this! | |
| From: [/{O | OPTIONFILE}:"option file"] | |
| .PARAMETER UpdatePreviouslyMigratedObjects | |
| Whether to update previously migrated objects. Default is True | |
| From: [/{UMO | UPDATEPREVIOUSLYMIGRATEDOBJECTS}:{YES | <NO>}] | |
| .EXAMPLE | |
| Migrate-ADMTUserCLI | |
| -samaccountname wframet ` # Migrate wframet | |
| -TargetSamaccountname wftest ` # into the wftest account | |
| -SourceDomain contoso.org ` # from contoso.org | |
| -SourceDomainController DC1.contoso.org ` # from this specific DC – I need this as I'm doing a Password migration | |
| -TargetDomain contoso.com ` # to contoso.com | |
| -TargetDomainController DC1.contoso.com ` # to this specific DC | |
| -UserPropertiesToExclude * ` # Exclude all props. We only want to pull sid history… | |
| -ConflictOptions MERGE ` # We know there is a conflict, so specify MERGE | |
| -PasswordOption COPY # Sync my password from contoso.org. (forces me to change, work around this at your own risk…) | |
| # I might run this if I want to migrate wframet to wftest specifically (i.e. new samaccountname) | |
| # I specify a specific source DC that has the PES service on it | |
| # I specify that I want to merge accounts | |
| # I specify that I want to COPY password | |
| .EXAMPLE | |
| Migrate-ADMTUserCLI | |
| -samaccountname UniqueUser ` # Migrate UniqueUser | |
| -SourceDomain contoso.org ` # from contoso.org | |
| -TargetDomain contoso.com ` # to contoso.com | |
| -TargetDomainController DC1.contoso.com ` # to this specific DC | |
| -TargetOU "test/Migration" ` # Create new user in the contoso.com/test/Migration OU | |
| -UserPropertiesToExclude * ` # Exclude all props. We only want to pull sid history… | |
| -verbose ` # Show what command runs… | |
| # I might run this to migrate UniqueUser from contoso.org to contoso.com. | |
| # If an existing account conflicts in contoso.com, this bombs out (IGNORE is default conflict option) | |
| .FUNCTIONALITY | |
| Active Directory | |
| #> | |
| [cmdletbinding(SupportsShouldProcess=$true, ConfirmImpact="High")] | |
| param ( | |
| [parameter(Mandatory=$false,ValueFromPipeline=$true,ValueFromPipelineByPropertyName=$true)] | |
| [string]$samaccountname, | |
| [string]$TargetSamaccountname, | |
| [parameter(Mandatory=$True)] | |
| #[validateset("contoso.com", "contoso.org")] | |
| [string]$SourceDomain, | |
| [parameter(Mandatory=$True)] | |
| [string]$SourceDomainController, | |
| [string]$SourceOU, | |
| [parameter(Mandatory=$True)] | |
| #[validateset("contoso.com", "contoso.org")] | |
| [string]$TargetDomain, | |
| [parameter(Mandatory=$True)] | |
| [string]$TargetDomainController, | |
| [string]$TargetOU, | |
| #[validateset("DC1.contoso.com", "DC1.contoso.org")] | |
| [string]$PasswordServer, | |
| [validateset("COPY","COMPLEX","COPY+NOTEXISTING","COMPLEX+NOTEXISTING")] | |
| [string]$PasswordOption = "COMPLEX+NOTEXISTING", | |
| [validateset('DISABLESOURCE','DISABLESOURCE+ENABLETARGET','DISABLETARGET','TARGETSAMEASSOURCE')] | |
| [string]$DisableOption, | |
| [bool]$MigrateGroups = $False, | |
| [bool]$MigrateSids = $True, | |
| [validatescript({Test-Path $_ -ErrorAction Stop})] | |
| [string]$IncludeFile, | |
| [validatescript({Test-Path $_ -ErrorAction Stop})] | |
| [string]$ExcludeFile, | |
| [validateset( | |
| "IGNORE", "MERGE", | |
| "MERGE+REMOVEUSERRIGHTS", "MERGE+REMOVEMEMBERS", "MERGE+MOVEMERGEDACCOUNTS", | |
| "MERGE+REMOVEUSERRIGHTS+REMOVEMEMBERS", "MERGE+REMOVEUSERRIGHTS+MOVEMERGEDACCOUNTS", "MERGE+REMOVEMEMBERS+MOVEMERGEDACCOUNTS", | |
| "MERGE+REMOVEUSERRIGHTS+REMOVEMEMBERS+MOVEMERGEDACCOUNTS" | |
| )] | |
| [string]$ConflictOptions, | |
| [string[]]$UserPropertiesToExclude, | |
| [bool]$FixGroupMembership = $True, | |
| [validatescript({Test-Path $_ -ErrorAction Stop})] | |
| [string]$OptionFile, | |
| [bool]$UpdatePreviouslyMigratedObjects = $True, | |
| # Stuff I didn't implement: | |
| # [/{IF | INTRAFOREST}:{YES | <NO>}] | |
| # [/{PF | PASSWORDFILE}:"password file name"] | |
| # [/{SEP | SOURCEEXPIRATION}:{<NONE> | 1 – 1095}] in days | |
| # [/{TRP | TRANSLATEROAMINGPROFILE}:{YES | <NO>}] | |
| # [/{UUR | UPDATEUSERRIGHTS}:{YES | <NO>}] | |
| # [/{MSA | MIGRATESERVICEACCOUNTS}:{YES | <NO>}] | |
| # [/{IX | INETORGPERSONPROPERTIESTOEXCLUDE}:{* | "property1,property2,…"}] | |
| # [/{GX | GROUPPROPERTIESTOEXCLUDE}:{* | "property1,property2,…"}] | |
| # /{N | INCLUDENAME} "name 1" "name 2"… | | |
| # /{D | INCLUDEDOMAIN}[:RECURSE[+{<FLATTEN> | MAINTAIN}]] | |
| # [/{EN | EXCLUDENAME} "name 1" "name 2"… | | |
| [switch]$Force | |
| ) | |
| Begin | |
| { | |
| $RejectAll = $false | |
| $ConfirmAll = $false | |
| #If you have known domain / DC with PES password service, consider enabling this | |
| <# | |
| $PasswordServerMap = @{ | |
| 'contoso.org' = "DC1.contoso.org" | |
| 'constoso.com' = "DC1.constoso.com" | |
| } | |
| if($PasswordOption -match 'COPY' -and -not $PasswordServer) | |
| { | |
| $PasswordServer = $PasswordServerMap.$SourceDomain | |
| if(-not $PasswordServer) | |
| { | |
| Throw "Could not find a Password server for PasswordOption '$PasswordOption', SourceDomain $SourceDomain" | |
| } | |
| } | |
| #> | |
| } | |
| Process | |
| { | |
| #Start building up parameters | |
| $CLIParams = New-Object System.Collections.Arraylist | |
| [void]$CLIParams.AddRange(@( | |
| "/SOURCEDOMAIN:`"$SourceDomain`"", | |
| "/SOURCEDOMAINCONTROLLER:`"$SourceDomainController`"", | |
| "/TARGETDOMAIN:`"$TargetDomain`"", | |
| "/TARGETDOMAINCONTROLLER:`"$TargetDomainController`"" | |
| )) | |
| if($TargetOU) {[void]$CLIParams.Add("/TARGETOU:`"$TargetOU`"")} | |
| if($SourceOU) { [void]$CLIParams.Add("/SOURCEOU:`"$SourceOU`"") } | |
| if($PasswordServer) { [void]$CLIParams.Add("/PASSWORDSERVER:`"$PasswordServer`"") } | |
| if($PasswordOption) { [void]$CLIParams.Add("/PASSWORDOPTION:$PasswordOption") } | |
| if($DisableOption) { [void]$CLIParams.Add("/DISABLEOPTION:$DisableOption") } | |
| #Translate bool to yes/no | |
| if($MigrateGroups) { [void]$CLIParams.Add("/MIGRATEGROUPS:YES") } | |
| else { [void]$CLIParams.Add("/MIGRATEGROUPS:NO") } | |
| if($MigrateSids) { [void]$CLIParams.Add("/MIGRATESIDS:YES") } | |
| else { [void]$CLIParams.Add("/MIGRATESIDS:NO") } | |
| if($FixGroupMembership) { [void]$CLIParams.Add("/FIXGROUPMEMBERSHIP:YES") } | |
| else { [void]$CLIParams.Add("/FIXGROUPMEMBERSHIP:NO") } | |
| if($UpdatePreviouslyMigratedObjects) { [void]$CLIParams.Add("/UPDATEPREVIOUSLYMIGRATEDOBJECTS:YES") } | |
| else { [void]$CLIParams.Add("/UPDATEPREVIOUSLYMIGRATEDOBJECTS:NO") } | |
| #Translate string array to string, or single value, no quotes | |
| if($UserPropertiesToExclude) | |
| { | |
| if($UserPropertiesToExclude -contains "*") | |
| { | |
| [void]$CLIParams.Add("/USERPROPERTIESTOEXCLUDE:*") | |
| } | |
| elseif($UserPropertiesToExclude -is [string[]]) | |
| { | |
| [void]$CLIParams.Add("/USERPROPERTIESTOEXCLUDE:`"$($USERPROPERTIESTOEXCLUDE -join ",")`"") | |
| } | |
| } | |
| if($OptionFile) { [void]$CLIParams.Add("/OPTIONFILE:`"$OptionFile`"") } | |
| if($ExcludeFile) { [void]$CLIParams.Add("/EXCLUDEFILE:`"$ExcludeFile`"") } | |
| if($IncludeFile) | |
| { | |
| [void]$CLIParams.Add("/INCLUDEFILE:`"$IncludeFile`"") | |
| } | |
| elseif($TargetSamaccountname) | |
| { | |
| # We hard coded this in with the assumption that if someone specified a targetsamaccountname, the intent was a merge | |
| # We don't use any of the other conflict options, but you might, so… commented this out. | |
| #$ConflictOptions = "MERGE" | |
| $File = "$env:USERPROFILE\$samaccountname-to-$TargetSamaccountname-from-$SourceDomain.csv" | |
| <# | |
| Important notes. From what I've seen: | |
| Without target RDN, the CN is renamed… | |
| The UPN is also renamed… | |
| Example format we construct. | |
| Sourcename,TargetRDN,TargetSAM | |
| cmonster,"CN=Monster\, Cookie",cmonster | |
| #> | |
| Try | |
| { | |
| # From https://gallery.technet.microsoft.com/scriptcenter/Get-ADSIObject-Portable-ae7f9184 | |
| $ExistingDN = @( Get-ADSIObject -samAccountName $TargetSamaccountname -Path $TargetDomainController -Property distinguishedname -ErrorAction stop | Select -ExpandProperty distinguishedname -ErrorAction SilentlyContinue ) | |
| If($ExistingDN.count -gt 1) | |
| { | |
| Throw "Error, expected 0 or 1 results, '$($ExistingDN.count)' returned:`n$($ExistingDN | Out-String)" | |
| } | |
| $ExistingDN = ( $ExistingDN[0] -split '(?<!\\),' )[0] | |
| } | |
| Catch | |
| { | |
| Throw "Error finding existing target account:`n$_" | |
| } | |
| Try | |
| { | |
| if($ExistingDN.count -eq 1) | |
| { | |
| $IncludeProps = @{ | |
| Sourcename = $samaccountname | |
| TargetRDN = $ExistingDN | |
| TargetSAM = $TargetSamaccountname | |
| } | |
| } | |
| else #count=0 | |
| { | |
| $IncludeProps = @{ | |
| Sourcename = $samaccountname | |
| TargetSAM = $TargetSamaccountname | |
| } | |
| } | |
| $TempObject = New-Object -TypeName PSObject -Property $IncludeProps | Select Sourcename, TargetRDN, TargetSAM | |
| $TempObject | Export-Csv -NoTypeInformation -path $File -force -ErrorAction stop | |
| Write-Verbose "Created IncludeFile $File with data:`n$($TempObject | ft -AutoSize | out-string)" | |
| Start-Sleep -Milliseconds 500 | |
| } | |
| Catch | |
| { | |
| Throw "Error creating csv for include file: $_" | |
| } | |
| [void]$CLIParams.Add("/INCLUDEFILE:`"$file`"") | |
| } | |
| elseif($samaccountname) | |
| { | |
| #We aren't using an includefile or a target sam. Just use the name | |
| [void]$CLIParams.Add("/INCLUDENAME `"$samaccountname`"") | |
| } | |
| #At this point, we should know conflict options… | |
| if($ConflictOptions) { [void]$CLIParams.Add("/CONFLICTOPTIONS:$ConflictOptions")} | |
| Write-Verbose "`n$($CLIParams | Out-String)" | |
| if($Force -or $PSCmdlet.ShouldProcess( "Processed the user '$samaccountname'", | |
| "Process the user '$samaccountname'?", | |
| "Processing user" )) | |
| { | |
| if($Force -Or $PSCmdlet.ShouldContinue("Are you REALLY sure you want to process `n$($CLIParams | Out-String)", "Processing '$samaccountname'", [ref]$ConfirmAll, [ref]$RejectAll)) { | |
| $Script = "admt.exe USER $CLIParams" | |
| Write-Verbose "Final command:`n$($script | Out-String)" | |
| #Quick and dirty. Really shouldn't be using this… Presumably, you're going to be running this in a tightly controlled environment : ) | |
| Invoke-Expression $Script | |
| } | |
| } | |
| } | |
| } | |
| # Quick and dirty ADSI query function (no RSAT needed). | |
| # We use this to get the target DN when merging with an existing user. | |
| # This should really be offloaded to another function. | |
| # We don't fix the UPN, which ADMT seems to enjoy changing as well | |
| function Get-ADSIObject { | |
| <# | |
| .SYNOPSIS | |
| Get AD object (user, group, etc.) via ADSI. | |
| .DESCRIPTION | |
| Get AD object (user, group, etc.) via ADSI. | |
| Invoke a specify an LDAP Query, or search based on samaccountname and/or objectcategory | |
| .FUNCTIONALITY | |
| Active Directory | |
| .PARAMETER samAccountName | |
| Specific samaccountname to filter on | |
| .PARAMETER ObjectCategory | |
| Specific objectCategory to filter on | |
| .PARAMETER Query | |
| LDAP filter to invoke | |
| .PARAMETER Path | |
| LDAP Path. e.g. contoso.com, DomainController1 | |
| LDAP:// is prepended when omitted | |
| .PARAMETER Property | |
| Specific properties to query for | |
| .PARAMETER Limit | |
| If specified, limit results to this size | |
| .PARAMETER SearchRoot | |
| If specified, narrow search to this root | |
| .PARAMETER Credential | |
| Credential to use for query | |
| If specified, the Path parameter must be specified as well. | |
| .PARAMETER As | |
| SearchResult = results directly from DirectorySearcher | |
| DirectoryEntry = Invoke GetDirectoryEntry against each DirectorySearcher object returned | |
| PSObject (Default) = Create a PSObject with expected properties and types | |
| .EXAMPLE | |
| Get-ADSIObject jdoe | |
| # Find an AD object with the samaccountname jdoe | |
| .EXAMPLE | |
| Get-ADSIObject -Query "(&(objectCategory=Group)(samaccountname=domain admins))" | |
| # Find an AD object meeting the specified criteria | |
| .EXAMPLE | |
| Get-ADSIObject -Query "(objectCategory=Group)" -Path contoso.com | |
| # List all groups at the root of contoso.com | |
| .EXAMPLE | |
| Echo jdoe, cmonster | Get-ADSIObject jdoe -property mail | Select -expandproperty mail | |
| # Find an AD object for a few users, extract the mail property only | |
| .EXAMPLE | |
| $DirectoryEntry = Get-ADSIObject TESTUSER -as DirectoryEntry | |
| $DirectoryEntry.put(‘Title’,’Test’) | |
| $DirectoryEntry.setinfo() | |
| #Get the AD object for TESTUSER in a usable form (DirectoryEntry), set the title attribute to Test, and make the change. | |
| #> | |
| [cmdletbinding(DefaultParameterSetName='SAM')] | |
| Param( | |
| [Parameter( Position=0, | |
| ValueFromPipeline=$true, | |
| ValueFromPipelineByPropertyName=$true, | |
| ParameterSetName='SAM')] | |
| [string[]]$samAccountName = "*", | |
| [Parameter( Position=1, | |
| ParameterSetName='SAM')] | |
| [string[]]$ObjectCategory = "*", | |
| [Parameter( ParameterSetName='Query', | |
| Mandatory = $true )] | |
| [string]$Query = $null, | |
| [string]$Path = $Null, | |
| [string[]]$Property = $Null, | |
| [int]$Limit, | |
| [string]$SearchRoot, | |
| [System.Management.Automation.PSCredential]$Credential, | |
| [validateset("PSObject","DirectoryEntry","SearchResult")] | |
| [string]$As = "PSObject" | |
| ) | |
| Begin | |
| { | |
| #Define parameters for creating the object | |
| $Params = @{ | |
| TypeName = "System.DirectoryServices.DirectoryEntry" | |
| ErrorAction = "Stop" | |
| } | |
| #If we have an LDAP path, add it in. | |
| if($Path){ | |
| if($Path -notlike "^LDAP") | |
| { | |
| $Path = "LDAP://$Path" | |
| } | |
| $Params.ArgumentList = @($Path) | |
| #if we have a credential, add it in | |
| if($Credential) | |
| { | |
| $Params.ArgumentList += $Credential.UserName | |
| $Params.ArgumentList += $Credential.GetNetworkCredential().Password | |
| } | |
| } | |
| elseif($Credential) | |
| { | |
| Throw "Using the Credential parameter requires a valid Path parameter" | |
| } | |
| #Create the domain entry for search root | |
| Try | |
| { | |
| Write-Verbose "Bound parameters:`n$($PSBoundParameters | Format-List | Out-String )`nCreating DirectoryEntry with parameters:`n$($Params | Out-String)" | |
| $DomainEntry = New-Object @Params | |
| } | |
| Catch | |
| { | |
| Throw "Could not establish DirectoryEntry: $_" | |
| } | |
| $DomainName = $DomainEntry.name | |
| #Set up the searcher | |
| $Searcher = New-Object -TypeName System.DirectoryServices.DirectorySearcher | |
| $Searcher.PageSize = 1000 | |
| $Searcher.SearchRoot = $DomainEntry | |
| if($Limit) | |
| { | |
| $Searcher.SizeLimit = $limit | |
| } | |
| if($Property) | |
| { | |
| foreach($Prop in $Property) | |
| { | |
| $Searcher.PropertiesToLoad.Add($Prop) | Out-Null | |
| } | |
| } | |
| if($SearchRoot) | |
| { | |
| if($SearchRoot -notlike "^LDAP") | |
| { | |
| $SearchRoot = "LDAP://$SearchRoot" | |
| } | |
| $Searcher.SearchRoot = [adsi]$SearchRoot | |
| } | |
| #Define a function to get ADSI results from a specific query | |
| Function Get-ADSIResult | |
| { | |
| [cmdletbinding()] | |
| param( | |
| [string[]]$Property = $Null, | |
| [string]$Query, | |
| [string]$As, | |
| $Searcher | |
| ) | |
| #Invoke the query | |
| $Results = $null | |
| $Searcher.Filter = $Query | |
| $Results = $Searcher.FindAll() | |
| #If SearchResult, just spit out the results. | |
| if($As -eq "SearchResult") | |
| { | |
| $Results | |
| } | |
| #If DirectoryEntry, invoke GetDirectoryEntry | |
| elseif($As -eq "DirectoryEntry") | |
| { | |
| $Results | ForEach-Object { $_.GetDirectoryEntry() } | |
| } | |
| #Otherwise, get properties from the object | |
| else | |
| { | |
| $Results | ForEach-Object { | |
| #Get the keys. They aren't an array, so split them up, remove empty, and trim just in case I screwed something up… | |
| $object = $_ | |
| #cast to array of strings or else PS2 breaks when we select down the line | |
| [string[]]$properties = ($object.properties.PropertyNames) -split "`r|`n" | Where-Object { $_ } | ForEach-Object { $_.Trim() } | |
| #Filter properties if desired | |
| if($Property) | |
| { | |
| $properties = $properties | Where-Object {$Property -Contains $_} | |
| } | |
| #Build up an object to output. Loop through each property, extract from ResultPropertyValueCollection | |
| #Create the object, PS2 compatibility. can't just pipe to select, props need to exist | |
| $hash = @{} | |
| foreach($prop in $properties) | |
| { | |
| $hash.$prop = $null | |
| } | |
| $Temp = New-Object -TypeName PSObject -Property $hash | Select -Property $properties | |
| foreach($Prop in $properties) | |
| { | |
| Try | |
| { | |
| $Temp.$Prop = foreach($item in $object.properties.$prop) | |
| { | |
| $item | |
| } | |
| } | |
| Catch | |
| { | |
| Write-Warning "Could not get property '$Prop': $_" | |
| } | |
| } | |
| $Temp | |
| } | |
| } | |
| } | |
| } | |
| Process | |
| { | |
| #Set up the query as defined, or look for a samaccountname. Probably a cleaner way to do this… | |
| if($PsCmdlet.ParameterSetName -eq 'Query'){ | |
| Write-Verbose "Working on Query '$Query'" | |
| Get-ADSIResult -Searcher $Searcher -Property $Property -Query $Query -As $As | |
| } | |
| else | |
| { | |
| foreach($AccountName in $samAccountName) | |
| { | |
| #Build up the LDAP query… | |
| $QueryArray = @( "(samAccountName=$AccountName)" ) | |
| if($ObjectCategory) | |
| { | |
| [string]$TempString = ( $ObjectCategory | ForEach-Object {"(objectCategory=$_)"} ) -join "" | |
| $QueryArray += "(|$TempString)" | |
| } | |
| $Query = "(&$($QueryArray -join ''))" | |
| Write-Verbose "Working on built Query '$Query'" | |
| Get-ADSIResult -Searcher $Searcher -Property $Property -Query $Query -As $As | |
| } | |
| } | |
| } | |
| End | |
| { | |
| $Searcher = $null | |
| $DomainEntry = $null | |
| } | |
| } | |
| <# | |
| LICENSE | |
| The MIT License (MIT) | |
| Copyright (c) 2015 ramblingcookiemonster | |
| Permission is hereby granted, free of charge, to any person obtaining a copy | |
| of this software and associated documentation files (the "Software"), to deal | |
| in the Software without restriction, including without limitation the rights | |
| to use, copy, modify, merge, publish, distribute, sublicense, and/or sell | |
| copies of the Software, and to permit persons to whom the Software is | |
| furnished to do so, subject to the following conditions: | |
| The above copyright notice and this permission notice shall be included in | |
| all copies or substantial portions of the Software. | |
| THE SOFTWARE IS PROVIDED "AS IS", WITHOUT WARRANTY OF ANY KIND, EXPRESS OR | |
| IMPLIED, INCLUDING BUT NOT LIMITED TO THE WARRANTIES OF MERCHANTABILITY, | |
| FITNESS FOR A PARTICULAR PURPOSE AND NONINFRINGEMENT. IN NO EVENT SHALL THE | |
| AUTHORS OR COPYRIGHT HOLDERS BE LIABLE FOR ANY CLAIM, DAMAGES OR OTHER | |
| LIABILITY, WHETHER IN AN ACTION OF CONTRACT, TORT OR OTHERWISE, ARISING FROM, | |
| OUT OF OR IN CONNECTION WITH THE SOFTWARE OR THE USE OR OTHER DEALINGS IN | |
| THE SOFTWARE. | |
| #> |
I figured I would have a look deeper into it and play around with it. Let’s delete our testmigration user and migrate him again with PowerShell.
Let’s take a look at how we can use this function at a basic level to start out (PowerShell as Administrator):


After checking the SID history of the migrated user again it all looks well. Let’s make this more production suitable.
Migrate-ADMTUserCLI -samaccountname testmigration `
-SourceDomain olddomain.corp.com `
-TargetDomain newdomain.corp.com `
-Verbose `
-SourceDomainController 2008R2-DC.olddomain.corp.com `
-TargetDomainController 2012R2-DC.newdomain.corp.com `
-Force `
-PasswordServer 2008R2-DC.olddomain.corp.com `
-PasswordOption COPY `
-ConflictOptions IGNORE `
-MigrateSids $true `
-MigrateGroups $false
Boom. Now we’re able to do all of those silly clicks in the GUI all in Powerhell. The only thing I’ve left off this code is the Target/Source OU. This is a great time to bring up those CSV files you created in the planning stage of the AD migration since now they’re going to save you tons of time.
Copy your CSV file’s of your staged groups over to the target domain and let’s get started!
$Users = Import-csv 'C:\Migration\DevOps_Users.csv'
#foreach
Foreach ($User in $users.SamAccountName){
Migrate-ADMTUserCLI -samaccountname $user `
-SourceDomain 'olddomain.corp.com' `
-TargetDomain 'newdomain.corp.com' `
-TargetOU 'IT/DevOps' `
-Verbose `
-SourceDomainController '2008R2-DC.olddomain.corp.com' `
-TargetDomainController '2012R2-DC.newdomain.corp.com' `
-Force `
-PasswordServer '2008R2-DC.olddomain.corp.com' `
-PasswordOption COPY `
-ConflictOptions IGNORE `
-MigrateSids $true `
-MigrateGroups $false
Now you can just sit back and watch the users migrate!
In this example above I’ve used a few hardcoded values. These can be as flexible as you make your CSV. Remember ground work before hand will save you a ton of time later on.
The next steps here would be however you want to handle it, You’re migrating users now and we’ve come a long way. Just make sure when you’re finished with this whole process that you remove SQL server and any accounts associated with this process. And of course, remove the GUI from the DC.
Good luck to all of you whom are undertaking this task and please let me know if you have any questions as always!
Edit: it’s good to mention that when you are doing migrating with SIDhistory you will want to disable to users in the olddomain as you bring them across to avoid any sort of issues with doubled-up SIDs and to also adhere to security best practises.

Thanks for blogging your experience with using PowerShell and ADMT. I’ll be tackling the same journey very soon.
LikeLike
No worries! do let me know if you have any questions or need a hand!
LikeLike